
Motivation
It is quite usual in web application development to use multiple environments before pushing code changes to production. Each team has its own development flow, but these environments are often named UAT, Staging, Dev … Usually we don’t want those environments to be publicly available, and a common way to protect them from occasional visitors is to add Basic or Digest Authentication to their webservers. This is pretty easy on Apache via Linux command line, and most web hosting control panels provide UIs to set it up too.
On the other side, it’s advisable and probably part of your team’s duties to perform security scans on your sites before pushing changes to production, and OWASP ZAP is one of the most common tools for it.
One of the great advantages of this tool is that it can be used both by security specialists and by unexperienced users. OWASP ZAP has a lovely, very easy to use Automated search button in its front page but if you try to use it against a site protected with Apache Basic Auth you will get the following message:
Failed to attach the URL: received a 401 response code, expected 200
So what to do now? The answer is in Authentication page in OWASP ZAP documentation, of course, but in this post I will provide a quick recipe of the steps to do for a nearly Automated Scan against a Basic Auth-protected server.
You can see the entire process in the following video, or read it along the post.
OWASP ZAP Context configuration
On the left of the application, double-click on Default Context. The Session properties dialog will appear. This is where most of our configurations will take place.
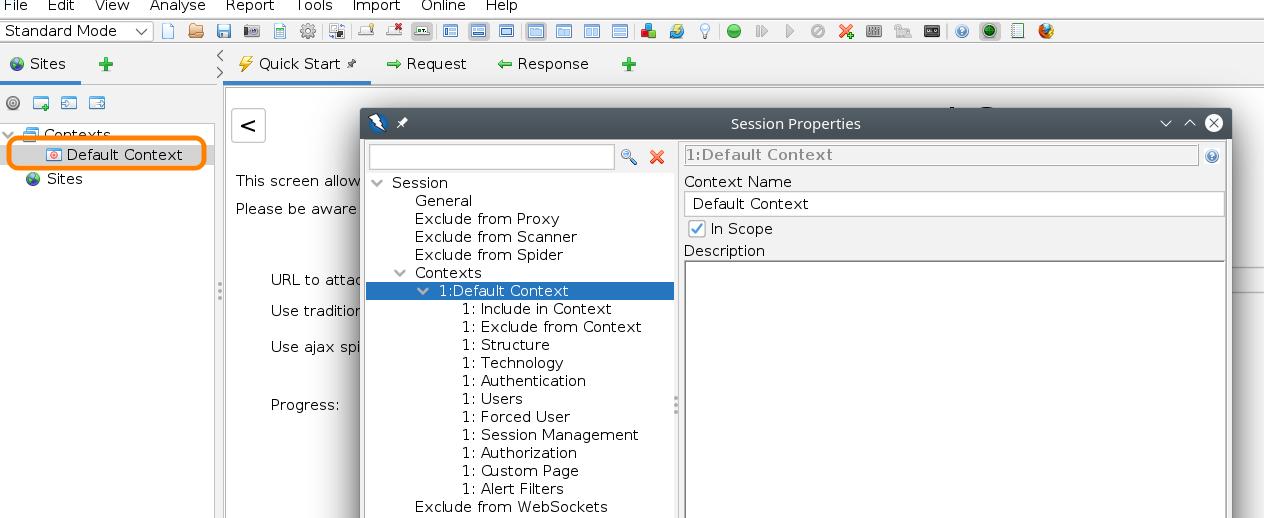
In Include in Context, add the pattern of the URL you want to attack. Usually this URL will be the base URL of your site adding ”.*“ at the end.
URL to attack: https://zap-test.webfutura.eu
URL pattern: https://zap-test.webfutura.eu.*
Next click Authentication, where you’ll select HTTP/NTLM Authentication instead of the default Manual Authentication.
You need to provide a Hostname and probably a Port (zap-test.webfutura.eu, 443 in our example).
In Users setting, you’ll have to add your authentication credentials, and finally in Session Management select HTTP Authentication Session Management. With these settings you are ready to go on the Session Properties dialog so press the Ok button.
Populate Sites settings
From a simplest-path point of view, we have already added the necessary settings, but OWASP ZAP still needs two actions from us. This is probably due to the fact that the program can also confront very complex analysis. As you can see on the left, the Sites element below Context is still empty and now we are going to populate it.
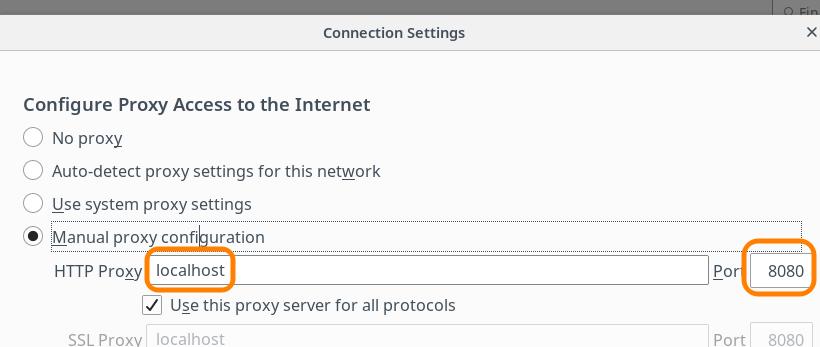
In order to add our Site there, we require a web browser and we will have to configure its traffic to proxy through OWASP ZAP. This means the following settings for the browser proxy:
Host: localhost
Port: 8080
This is the configuration on Firefox, other browsers should have similar settings:
Once this configration is set, we only need to trigger a single visit to the target environment. So place the URL in the browser bar, accept the security warning if the connection was https, and take a look back at OWASP ZAP sidebar:
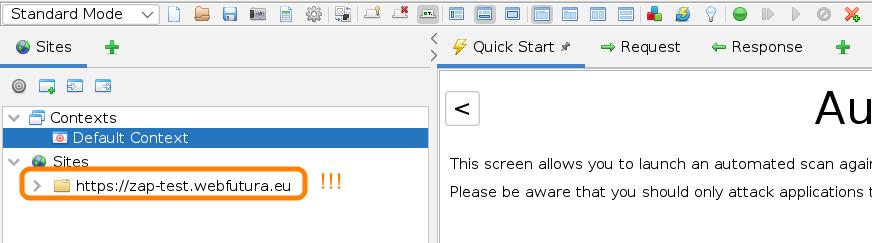
your site should appear just there, so you can close the tab, go back to network settings in your browser and revert the proxying.
Launch the scan
Everything is ready for our scan, so right-click in Default Context on the sidebar and click Spider so OWASP ZAP begins your site’s inspection. When it finishes, a list of all the URLs it has found will appear at the bottom panel of the application. Be careful at this point.
If any of the URLs in your site is missing in the list, it’s possible that you made an error in the Session Properties dialog. If this is the case, form POST submission won’t appear there, only some attempts on GET urls.
Once you think a reasonable amount of URLs appear in that panel, right-click again in Default Context and now click on Active Scan.
Don’t forget to select the user you created previously in both Spider and Active Scan settings dialog.

At this point check the Code and Reason colummns. There should be some URLs with 2xx responses, meaning your authentication settings were correct. Otherwise you will get something like this, with a lot of 401 Unauthorized.

So, in this point, if you didn’t get your expected results jump back to the Session Properties dialog and try to resolve the situation. When you are done, your scan will take quite a long time depending on the size of the site, but your results can be viewed in the Alerts tab.
Analyse scan results
Hopefully you won’t get any Medium or High messages as these:

Ouch !! That XSS alert is really painful. This is a developer’s responsibility and should be solved. You can compare the two branches in the GitHub repo referenced below and learn how to write vulnerable code with Laravel. Actually this is not an easy task as nowadays most frameworks take some preventions in our name so we avoid this kind of errors.
Repository
You can get the code of the target website in the project repository at GitHub. It contains two branches. The secure code is in “secure” branch. You’ll find the vulnerable code in the “vulnerable” branch.
I hope it was useful, please send your comments, corrections or whatever using the form below.
Comment on this post